Yes, I know today is the 8th Challenge of that Generation Art thing, but I have something else to tell you, something important! Generation Art will have to wait until tomorrow!
I did my very first wet printing!
I did announce that I’d do it some time ago already in this post, and at last, yesterday my order for a starter set has come in from Fotoimpex! Nothing fancy, just the very basic things I needed to dip my fingers in the developer.
Two trays, two tweezers, the developer and fixer, that’s all! Ah OK, wait theres also a package of 25 sheets of Adox Multigrade paper.
OK, so here I go… I need a darkroom and head to my bathroom, close the shutter and…. damn, there’s still light filtering through the sides of the shutter. But I watched McGyver when I was young, so this is no problem for me. A black trash bag, cut open and taped to the exterior of the window does the trick. For good measure I hang a dark towel over the window.
Another towel, rolled up, sucks up all the light coming in below the door. The enlarger goes on that useless bidet (who ever uses such a thing???), the trays with the developer, water for stop bath (I ordered a third tray with the kit) and fixer go in the shower stall.
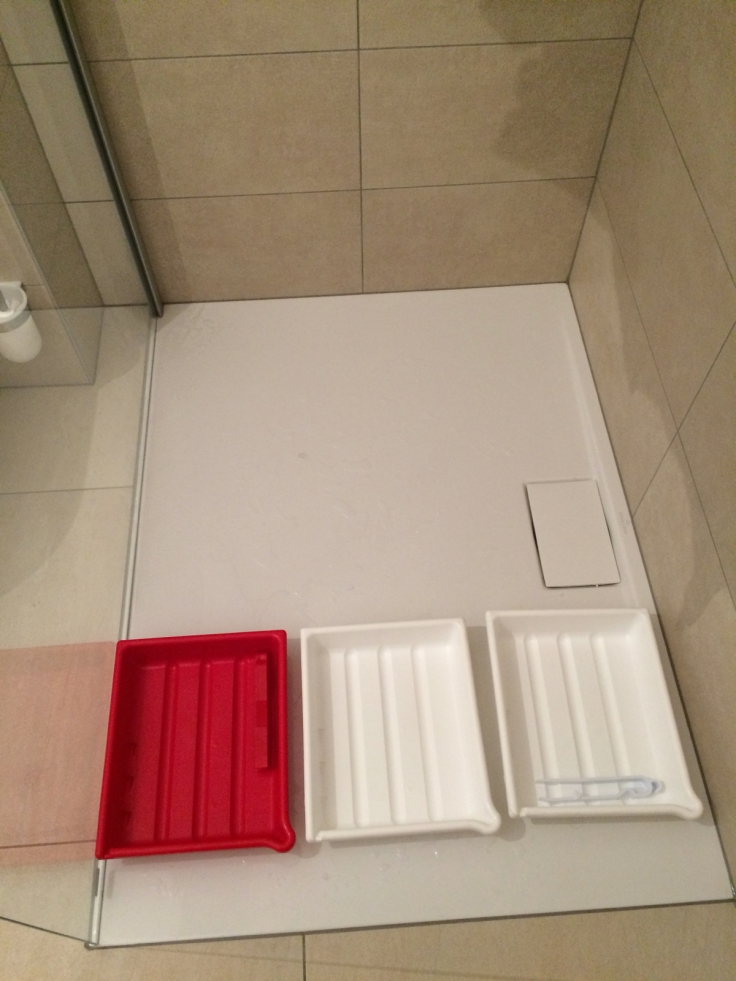 Final wash will happen in the sink!
Ready!
I feed a negative strip into the enlarger and do my very first test strip… 3, 6, 9, 12, 15 seconds… developer, stop, fix and here it comes.
I decide to go for 12 seconds. With trembling hands I open the sealed folder with the paper (and yes, I turned off the light!), take it out and watch it curl up on the baseboard of the enlarger… darn, an easel would be a fine thing. But I have some scotch tape and just tape the corners to the board. And of course I focused correctly before!
I hit the switch, count to 12, develop, fix….. and the first photo is too dark. But I have 25 sheets, so it should be possible to get that right. Next try was better, much better. Just the T-shirt was too bright. One more then… done… OK, the fourth one is very much OK. I tried to keep some of the light off the background to get some detail in the shadows but well, I’m not Ansel Adams. Well, not yet 😉
I like this one, it has it’s flaws, sure, the background is completely black, no details, but that will have to be addressed when I grow my skills. Here’s the scanned version of this pic:
Of course the print is just photographed with my iPhone, so I can’t really compare. The real print comes VERY close to the version on screen.
My second try did leave me a bit depressed. I was unable to get something good out of the negative. The result is greyish, washed out, regardless of the exposure.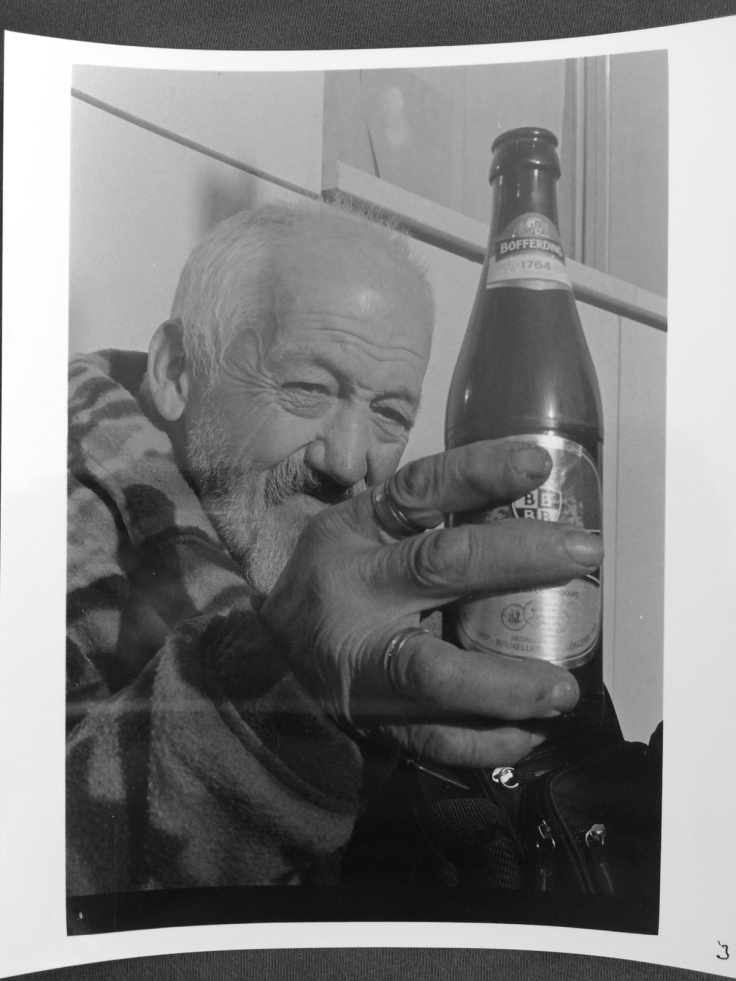
This one is much better when scanned and Lightroomed a bit (well, quite a bit too much I see now).
But I won’t give up, not on my first try. Perhaps I’d better get some professional help! No, not a psychiatrist, I was thinking of some darkroom sessions with a pro.
OK, One more for the road! This one, a picture made with my venerable Leica IIIa and the Jupiter 8 lens was a winner! Came out quite OK on the first try.
Here’s the scanned version
The print is better than it appears, it is quite a bit lighter in fact, but would need more work, that’s sure, and I’m not yet up to that level.
By now Time had run out. In fact, two hours have passed in just a few seconds and here are the results.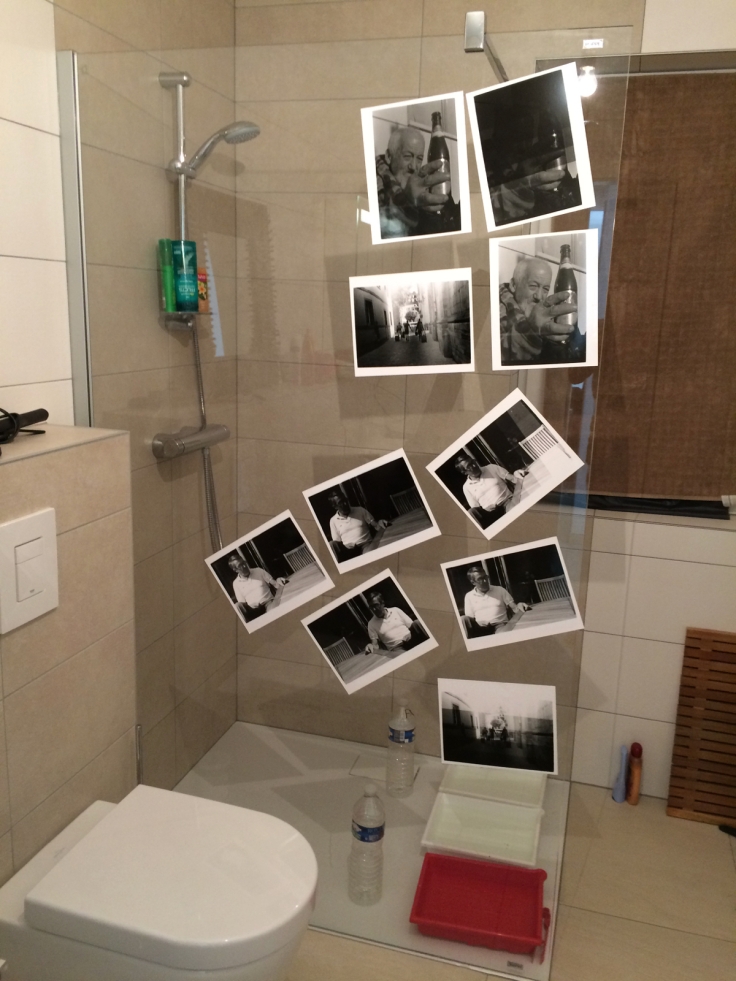
Ten prints of varying quality, two hours of work and the realisation that this is not going to be that easy. The results are encouraging, not great for sure, but encouraging. Still it will take a lot of time and tries to get something I will be completely happy with.
Scanning and some Lightroom work takes time too, sure, but less than this. Is it worth it? I was amazed when I saw the first image appear in the developer. That’s magic! And to become a great magician it takes years of study…..
Am I willing to plunge into this?
Shall I?
Tell me what you think!
Thanks for being here!

If you want more contrast of the man with the beer bottle, you will have to use a harder paper!
Best wishes,
Dave
LikeLike
Thanks Dave…. but I think the negative is hopelessly underexposed. On the scanner it works though, I can get good contrast out of it
LikeLike
It should still be possible!!
LikeLiked by 1 person
It is great to see photos in print…
LikeLiked by 1 person
Congrats Frank! Enjoy! (Love the beer bottle shot by the way.)
LikeLiked by 1 person
Thanks
LikeLike
These look very promising results. I think it’s better to learn from trial and error on your own equipment and find out things as you go along. You can save paper and money by using test strips across the important areas of the image and then exposing them at different times and work out your exposure timings from there. You can change contrast with coloured celluloid filters.
LikeLiked by 1 person
Will do, thanks
LikeLike
This is great, and wow Frank, your results look awesome! Congrats!!
LikeLiked by 1 person
Thanks! Hope I have the courage to continue…. and the time!
LikeLiked by 1 person
Hey if you had the courage to do it once, you can definitely do it again!! Now I need to follow you and try it! 🙂
LikeLiked by 1 person
Yes, another convert!!! 😉
LikeLiked by 1 person
Great work Frank! Totally worth it in my opinion. In the end it’s all about finding and sacrificing time. If you can do that – it is definitely worth pursuing. All the best.
LikeLiked by 1 person
Well done! 😀
LikeLiked by 1 person